Mastering Attic Fan Installation: A Guide for Homeowners
 Installing an attic fan is a great investment. In summer, it will blow out the heat that rises up to the attic and by doing so, will reduce the air conditioning load which will in turn reduce your power consumption. In winter, it will help equalize the interior and exterior temperatures which will inhibit the development of moisture and mold. Installing an attic fan is more complicated than it initially appears to be, as this basic guide will show.
- Buy the fan you want to install. That means knowing what size is right for your home. A roof-mounted fan is the best choice.
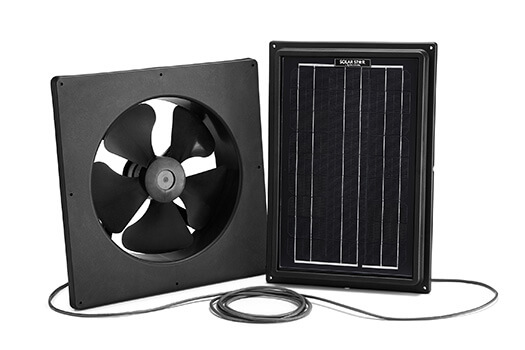
- Find the electrical source. The further away it is from the point of installation, the more the wiring you will have to run. A better option is to go in for a solar-powered attic fan which does not consume electricity and needs no external power source.
- Mark the installation location between 2 roof rafters.
- Hammer in a nail to mark the location.
- Install a fall arrest system and roof brackets on the roof.
- Use a dowel compass to mark the outline of the vent’s flashing on the roof.
- Cut the shingles to create a circle.
- Remove shingles and debris from within the newly cut circle.
- Remove any nails while being careful not to injure yourself.
- Use the compass to mark the hole to be made for the fan on the sheathing of the roof.
- Use a reciprocating saw to cut the hole in the roof.
Also Read: Whole House Fan vs Attic Fan: What’s the Difference
- Remove any shingles and debris.
- Use roofing cement to create an unbroken and continuous bead around the edge of the hole.
- Set the fan in the hole.
- Screw the fan’s flashing onto the roof. Apply caulking, as required, around the flashing.
- Use roofing nails (1 ½ inches long is the normal size) to replace roof shingles around the fan.
- Run the fan.
Along with the fan, it’s a good idea to install a thermal switch so that the fan comes on automatically at a set temperature and switches off when the temperature drops. If you are installing a solar-powered fan and shadows limit its performance, buy and install an add-on solar panel that can be placed where there is more sunlight.
Although it may at first appear to be a task that a home handyman can accomplish without too much fuss, the reality, as shown above, is different. It needs a knowledge of electrical work, carpentry, and less common jobs like framing and removing and replacing tiles. Any mistakes in the installation could cost a lot in the way of future repairs. Incorrect installation could also affect the fan’s performance and even void the warranty. A better option is to buy the best attic fan and then have the dealer do a neat, clean, quick and professional installation for you. That way, you can be sure of many years of trouble-free performance. Crawling around in the heat and dust of the attic in summer is not something even a dedicated DIY enthusiast will enjoy.
Frequently Asked Questions
- Why should I install an attic fan?
Attic fans help reduce heat buildup in the attic during summer, lowering air conditioning costs, and prevent moisture and mold in winter by equalizing temperatures.
- What type of attic fan should I buy?
A roof-mounted fan is recommended for optimal performance. Consider a solar-powered attic fan to reduce electricity consumption and eliminate the need for external power sources.
- How do I install an attic fan?
Mark the installation location between roof rafters, cut a hole in the roof, install the fan’s flashing, secure it with screws and caulking, then replace roof shingles around the fan.
- Should I install a thermal switch with the attic fan?
Yes, installing a thermal switch allows the fan to turn on automatically at a set temperature and off when the temperature drops, improving efficiency.
- What if my attic fan’s performance is limited by shadows?
Consider installing an add-on solar panel in an area with more sunlight to enhance the performance of a solar-powered attic fan.